Actions
Actions are used to trigger Maven App execution to respond to a user question. The LLM chooses which Action to execute based on the question and the current state of the conversation.
Most customers will add Actions to their Agent by installing existing Maven Apps via the App Marketplace. For advanced use cases, Actions can also be created using the Maven API.
Example
The Weatherapi App is a simple app, written by Maven which provides 2 actions when installed:
- Get the current weather
- Get a 7 day weather forecast
If a user asks to “reset my password”, that phrase is not at all related to the weather, and so no actions will be called.
But if the user asks for “how hot is it in Boston?”, the get current weather action will be called and the data returned to the LLM. The user will receive a response similar to “It’s 80F”.
On the conversation page for this last example Maven will display that the action was called as well as exactly what data came back from the action code. Note that the action response is never shown directly to the user. Action responses are usually JSON or another machine-readable format. The response is always given to the LLM first.
Actions vs Triggers
Action code is only called in response to a user question, deciding whether an action is called is handled by the LLM. Actions are used to get or update information on behalf of users.
Trigger code is called in response to an event. Trigger code execution is usually used for data reporting - e.g. exporting to a BI tool like Snowflake or updating a Zendesk ticket with a specific tag whenever a user clicks thumbs down.
MCP Server Integration
Another way to integrate 3rd party systems with Maven is through MCP (Model Context Protocol). Any remote MCP Server can be brought into Maven via the MCP Maven App and Maven will acquire the ability to use any of the tools the server exposes as Maven actions.
Quick Start Guide
Generate Authenticated URL
Generate an authenticated URL pointing to the remote MCP Server using a tool such as smithery.ai
Step-by-Step Example: Integrating Monday.com
Let’s see how this works in practice with an example using Monday.com CRM integration:
Imagine you’re a Maven customer with information in Monday.com that you want available to Maven, along with your support staff who leverage Maven as a copilot. You’d also like your team to tell Maven to take actions against Monday.com CRM, such as updating it with information from chat interactions.
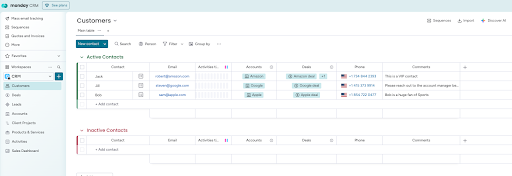
Set up your Monday.com board
Start with your existing Monday.com board - in this example, we have a “Customers” board with customer information.
Find an MCP Server
Search for an MCP Server for Monday.com on smithery.ai.
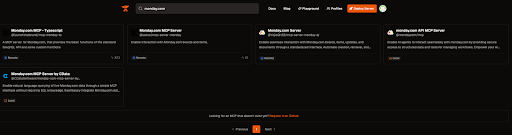
Select a remote MCP Server
Choose one that’s tagged “remote” with high usage, or select another that meets your needs.
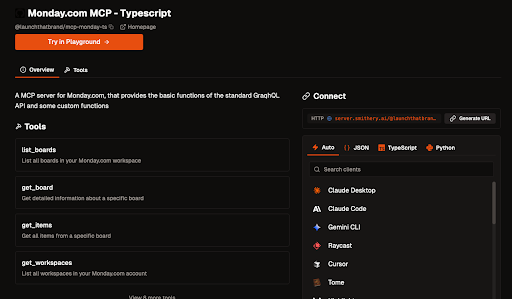
Generate authenticated URL
Click the “Generate URL” button and prepare to supply credentials to build the authenticated remote URL.
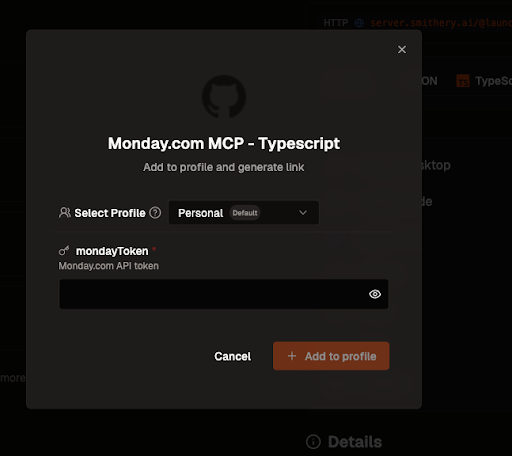
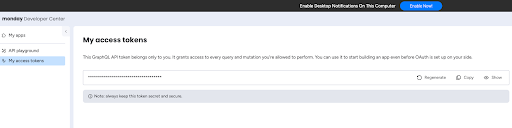
Get your Monday.com API token
Retrieve your API token from the Monday.com developer center.
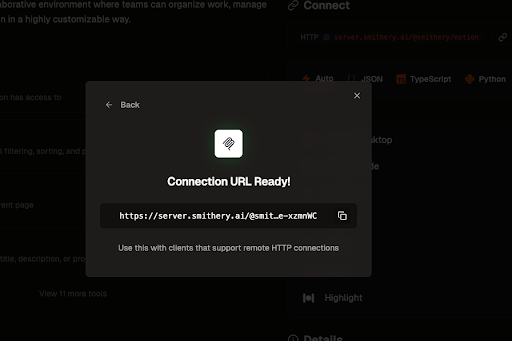
Create the authenticated URL
Paste your API token into Smithery and generate the connection link. Copy this link to bring over to Maven.
A2A (Agent-to-Agent) Integration
Maven supports Agent-to-Agent (A2A) communication through JSON-RPC 2.0 protocol. This integration allows Maven to discover and connect with multiple external A2A agents simultaneously via their publicly accessible agent card URLs. Maven automatically fetches agent metadata, then registers all discovered capabilities as actions that can be called by your agent.
Key Features
- Multi-Server Integration: Connect to multiple A2A servers simultaneously
- Automatic Discovery: Automatically discovers all capabilities from connected agents
- Intelligent Routing: Routes LLM calls to the correct A2A server automatically
- Enhanced Descriptions: Adds server context to help the LLM choose the right action
A2A Quick Start Guide
Step-by-Step Example: Integrating Multiple A2A Services
Let’s walk through a real-world example of integrating multiple A2A agents with Maven. In this scenario, you want to connect your support team’s Maven agent to several specialized services: document processing, weather information, and database queries.
Identify your A2A services
For this example, we’ll integrate three different A2A agents:
- Document Processing Agent at
https://docs.company.com/.well-known/agent.json - Weather Service Agent at
https://weather-api.service.com/.well-known/agent.json - Database Query Agent at
https://internal.company.com/.well-known/agent.json
Install and configure the A2A app
Install the A2A app and provide all three agent card URLs during the configuration process. The app supports connecting to multiple A2A servers simultaneously.
Automatic discovery and registration
Maven will automatically:
- Fetch the agent metadata from each URL
- Discover all available capabilities from each agent
- Register them as actions with clear naming (e.g.,
a2a_search_documents,a2a_get_weather,a2a_query_users)
Test the multi-agent integration
Test your new A2A integration by asking Maven questions that utilize different agents:
- “Search for climate change documents and get tomorrow’s weather forecast”
- “Find user records for customers in New York and check the weather there”
- “Extract text from the uploaded PDF and search our database for similar cases”
Maven will intelligently route these requests to the appropriate A2A agents and combine the results in natural conversation.
Action States
Actions can be in one of three states:
Tuning Actions
When a customer asks a question, Maven will find relevant Actions and provide them to the LLM.
These relevant Actions include all Actions which are Pinned as well as any actions whose description field is similar to the user question. The original description field is provided by the Maven App which created the Action. However, this field can be overridden on the Action Details page if the description does not match your business logic needs.
Navigation
-
Actions: The Actions page displays all Actions created by the user. Actions can be bulk selected to change their state.
-
Action Details: Clicking on a row in the Actions table opens the Action Details page. This page displays the full Action text and allows editing of the Action description.