Maven AGI Copilot Installation Guide
This guide provides step-by-step instructions for configuring the Maven AGI Copilot application on a ServiceNow instance after installation from the Store.
Prerequisites
Before you begin, ensure you have:
- ServiceNow instance with admin access
- Maven AGI Copilot application installed from the ServiceNow Store
- Maven AGI account credentials (organization ID and agent ID from Agent Designer)
Setup Overview
The complete configuration process involves these steps:
- OAuth Configuration
- Maven AGI Configuration
- Configure Application Properties
- Configure UI Builder for Service Operations Workspace (SOW)
- Test the Installation
- Email Configuration (Optional)
1. OAuth Configuration
1.1 Enable Client Credentials Grant
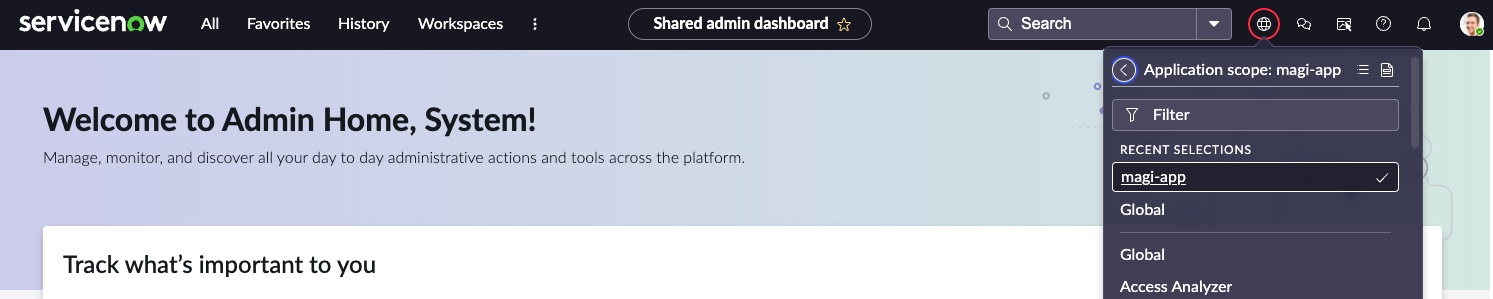
Important: This step must be performed FIRST, before creating the OAuth Client Credentials Grant. This step must be performed in the Global scope. When you first log into your ServiceNow instance, you should already be in the Global scope, but verify by checking the scope selector in the top navigation bar.
- Navigate to: All > sys_properties.list
- Search for or create the property:
- Property:
glide.oauth.inbound.client.credential.grant_type.enabled - Value:
true - Type:
true | false
- Property:
- Click Submit, Create, or Update (if creating new)

1.2 Create OAuth Client Credentials Grant
This step can be performed in the Global scope or in the Maven AGI Copilot (x_magi_app) scope. Ensure step 1.1 is completed first.
The navigation path varies depending on your ServiceNow version:
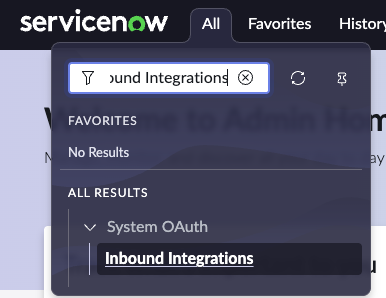
For ServiceNow Zurich and Yokohama (Inbound Integrations)
- Navigate to: Instance > Inbound Integrations
- Click New Integration
- Select Client credentials grant
- Fill in the form:
- Name: Enter a descriptive name (e.g., “Maven AGI Integration”)
- OAuth application user: System Administrator
- Client ID: Auto-generated (copy and save this value)
- Client Secret: Auto-generated (copy and save this value)
- Click Submit
For ServiceNow Xanadu (Application Registry)
- Navigate to: System OAuth > Application Registry

- Click New
- Select Create an OAuth API endpoint for external clients

- Fill in the form:
- Name: Enter a descriptive name (e.g., “Maven AGI Integration”)
- Public Client: Leave unchecked (Client Credentials grant requires a confidential client)
- Client Type: Select “Integration as a Service” (for machine-to-machine integrations)
- Redirect URL and Login URL: Leave blank (not used for Client Credentials grant)
- Client Secret: Leave blank (the system will auto-generate it after you save)
- OAuth Application User: If visible, select System Administrator. If not visible, see below.

- Click Submit
Configure OAuth Application User (if field was not visible)
The OAuth Application User must be configured, otherwise you will receive an error: “integration user is not configured for OAuth” when trying to authenticate.
If the OAuth Application User field was not visible in step 4:
- Right-click on the form and select Form Layout
- In the left panel, find the OAuth Application User field (or search for
oauth_application_user) - Drag it to the right panel to add it to the form
- Click Save
- The OAuth Application User field should now be visible in the form
- Select System Administrator (or another user with appropriate permissions)
- Click Save
Save Your Credentials
After saving, copy and save the generated values:
- Client ID: Copy and save this auto-generated value
- Client Secret: Copy and save this auto-generated value
Save both the Client ID and Client Secret securely. You will need these values for Maven AGI configuration.
2. Maven AGI Configuration
Configure the Maven AGI agent using the ServiceNow instance URL, Client ID, and Client Secret from section 1.
- Log into your Maven AGI account at app.mavenagi.com
- Navigate to agent settings
- Install/configure the ServiceNow connector with:
- Instance URL: Your ServiceNow instance URL (e.g.,
https://your-instance.service-now.com) - Client ID: From section 1.2
- Client Secret: From section 1.2
- Instance URL: Your ServiceNow instance URL (e.g.,
- Click Install or Update
Maven will test the connection and confirm successful authentication. After configuring the agent in Maven AGI, proceed to section 3 to complete the ServiceNow configuration.
3. Configure Application Properties
Application properties are configured through the Maven Configuration Page.
3.1 Access Maven Configuration Page
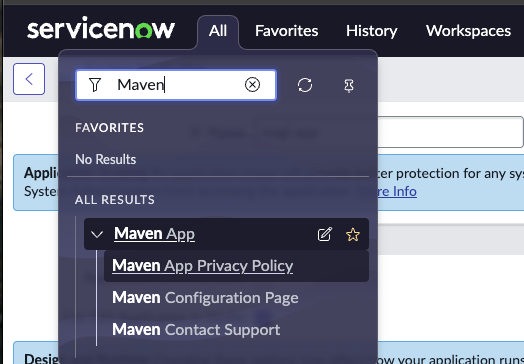
- Navigate to: All and type Maven in the search field
- Select Maven App Configuration Page from the search results
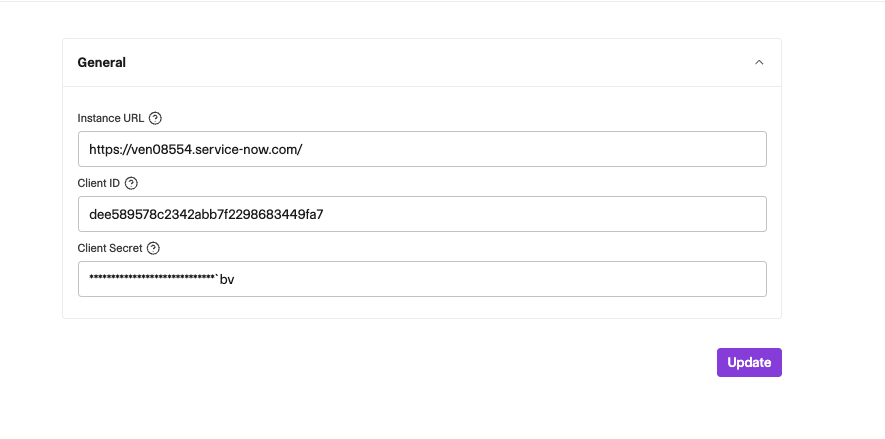
Choose the configuration page. You should see a page like this:
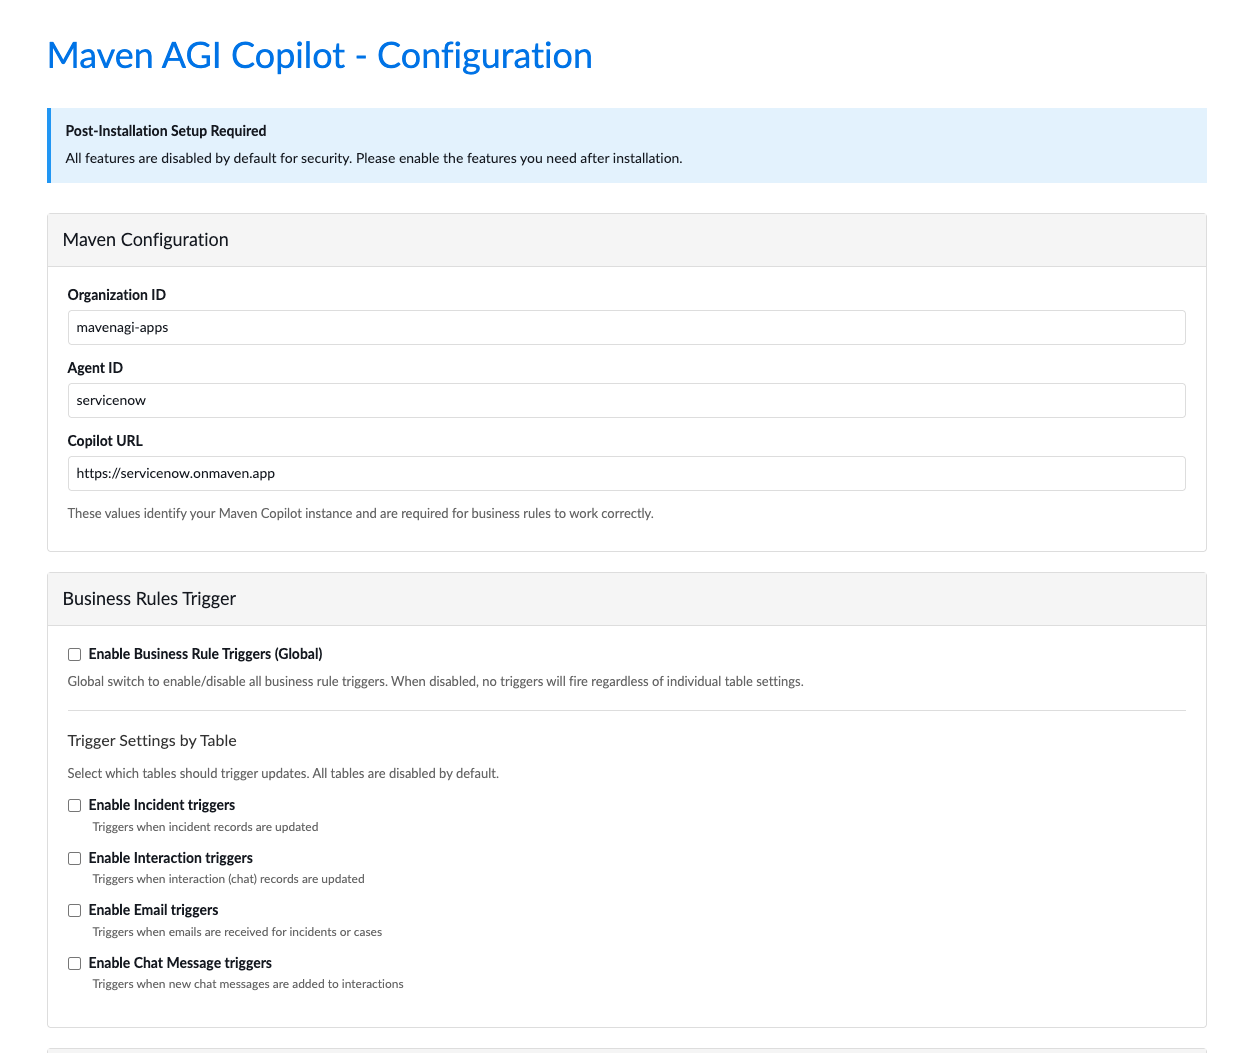
3.2 Configure Maven Settings
In the Maven Configuration section, verify and set:
- Organization ID: Your Maven AGI organization ID (e.g.,
mavenagi-apps) - Agent ID: Your Maven AGI agent ID
- Copilot URL:
https://servicenow.onmaven.app(default)
If you delete the copilotUrl property, the app will default to https://servicenow.onmaven.app.
3.3 Configure Business Rules Triggers
Under Business Rules Trigger Configuration:
- Enable Business Rule Triggers (Global): Enable the global switch to allow business rule triggers
- Under Trigger Settings by Table, enable the triggers you need:
- ✅ Enable Incident triggers: Triggers when incident records are updated
- ✅ Enable Interaction triggers: Triggers when interaction (chat) records are updated
- ✅ Enable Email triggers: Triggers when emails are received for incidents or cases
- ✅ Enable Chat Message triggers: Triggers when new chat messages are added to interactions
3.4 Configure Knowledge Base Access (Optional)
If you want Maven Copilot to access ServiceNow knowledge articles:
- Enable Knowledge Base Access: Turn on the toggle
- Under Knowledge Tables, enable the tables you need:
- Enable kb_knowledge table: Knowledge articles table
- Enable kb_category table: Knowledge categories table
- Enable kb_knowledge_base table: Knowledge bases table
3.5 Configure Webhook Authentication
- Webhook API Key: Generate a secure API key using
openssl rand -hex 32and enter it here - This key is required for business rules to authenticate webhook calls from ServiceNow to Maven Copilot
The same API key must be configured in your Maven AGI backend settings.
- Click Save Configuration
All features are disabled by default for security. Enable only the features you need after installation.
4. Configure UI Builder for Service Operations Workspace (SOW)
After installing the app, the Maven Copilot UI component is available and can be configured on the Service Operations Workspace (SOW) sidebar.
4.1 Find SOW Experience
- Navigate to: UI Builder

- Go to the Experiences tab
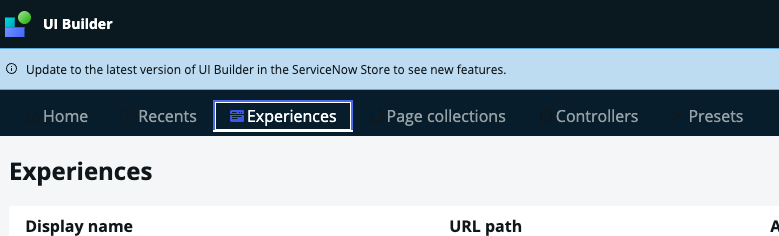
- In the search box, type: SOW or Service Operations Workspace
- Select the appropriate SOW experience

4.2 Configure Sidebar
The steps differ depending on your ServiceNow version.
For ServiceNow Zurich and Yokohama
- Click on the Tab sidebar in the left navigation
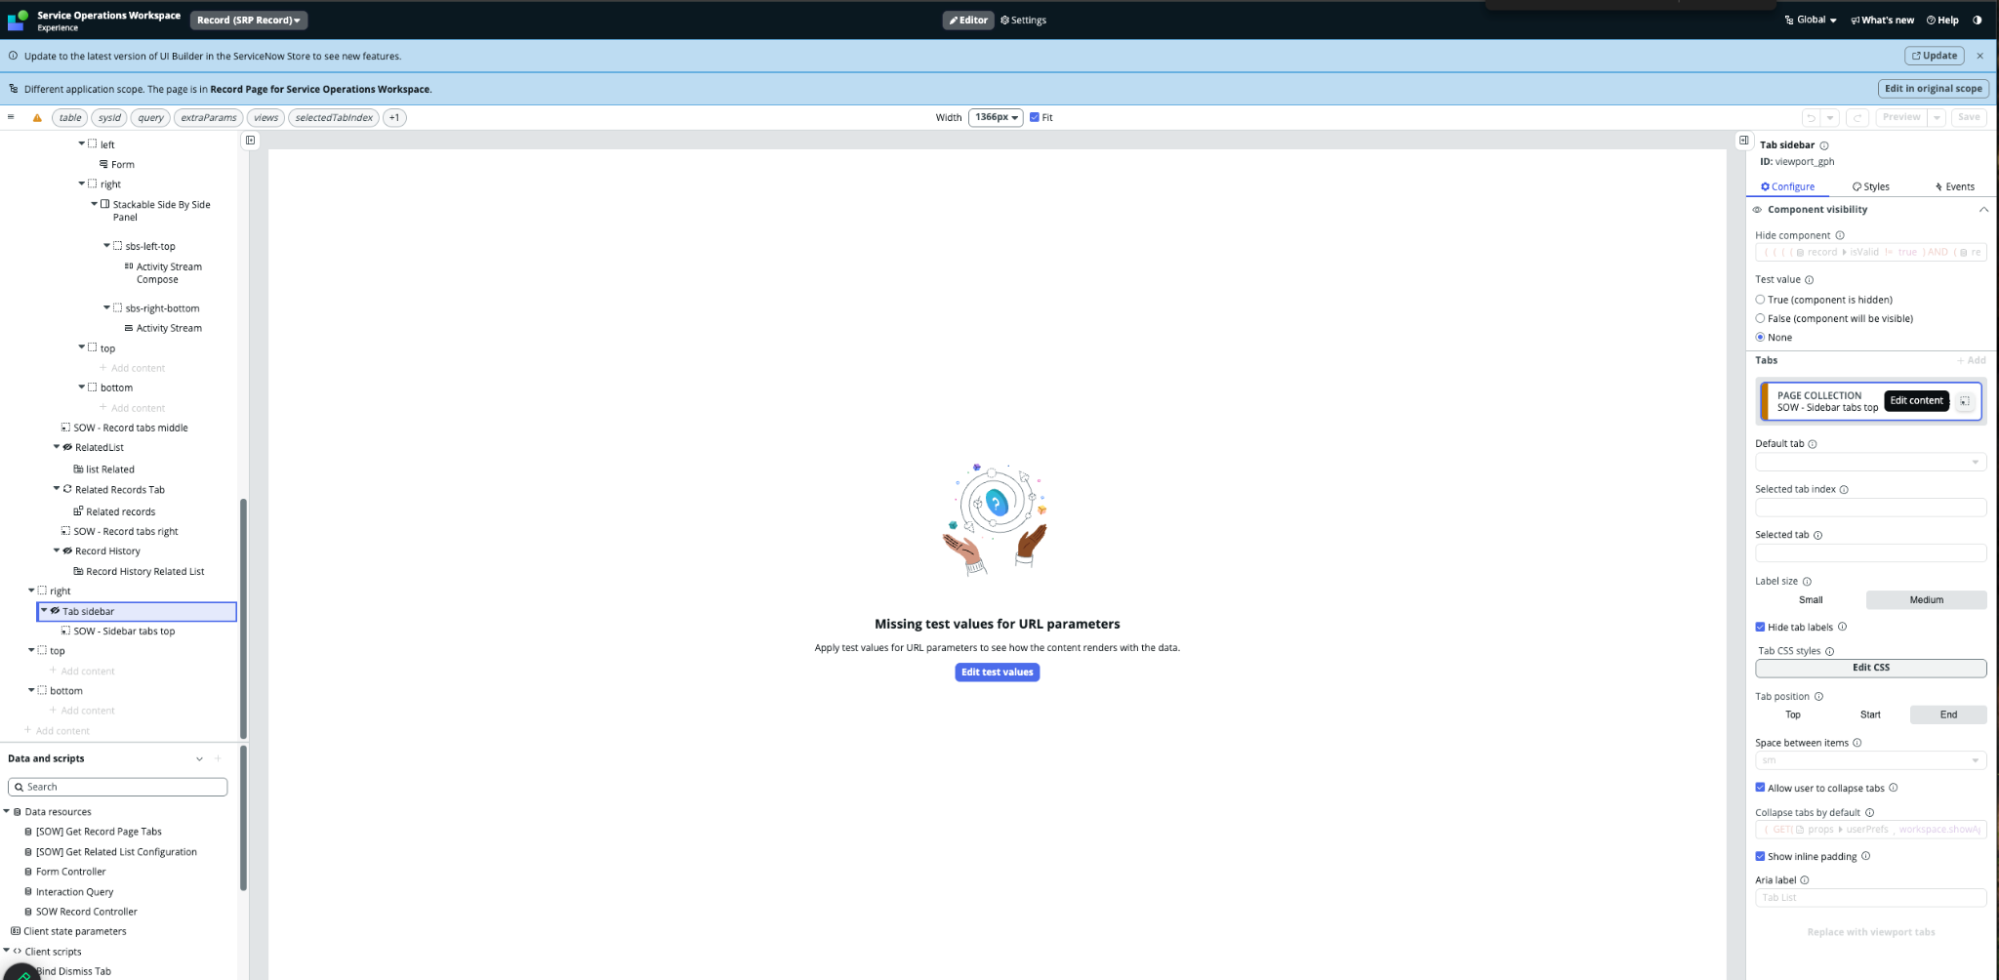
- On the right side, in the Page Collection area, click the dotted box to edit content

- Proceed to section 4.3
For ServiceNow Xanadu
In Xanadu, you might not be able to see the dotted square on the Page Collection area. In this case, you need to duplicate the SRP Record:
- Click on the Tab sidebar in the left navigation
- In the Page Collection area, you will see the existing record (e.g., “SOW - Sidebar tabs top”)
- Navigate to: UI Builder > Page Collections (or find the SRP Record directly)
- Open the SOW - Sidebar tabs top record (or the appropriate Page Collection record)
- Click Edit on the original scope (if the page is read-only)
- Click Duplicate variant
- Fill in the form:
- Name: Enter a name (e.g., “Maven Copilot Sidebar”)
- Application: Select Maven AGI Copilot (x_magi_app) scope
- Click Create or Save
- Go back to: UI Builder > Experiences > Service Operations Workspace
- You should now see the copilot record in the Page Collection
- Proceed to section 4.3
4.3 Create New Page
- Click Create new page
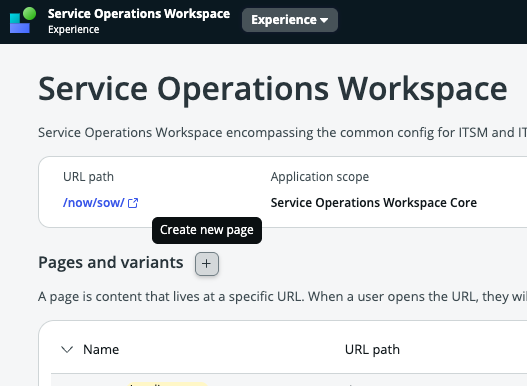
- Create from scratch instead of using a template
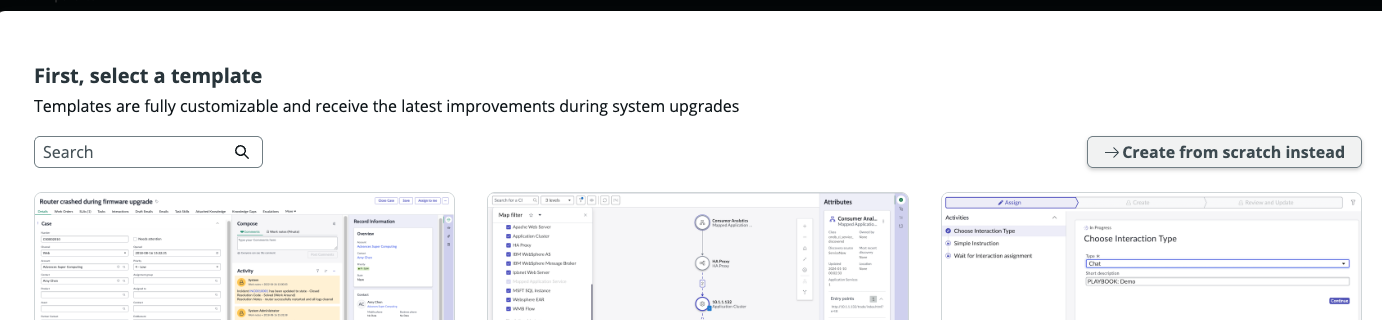
- You should see the “Maven Copilot” page setup details
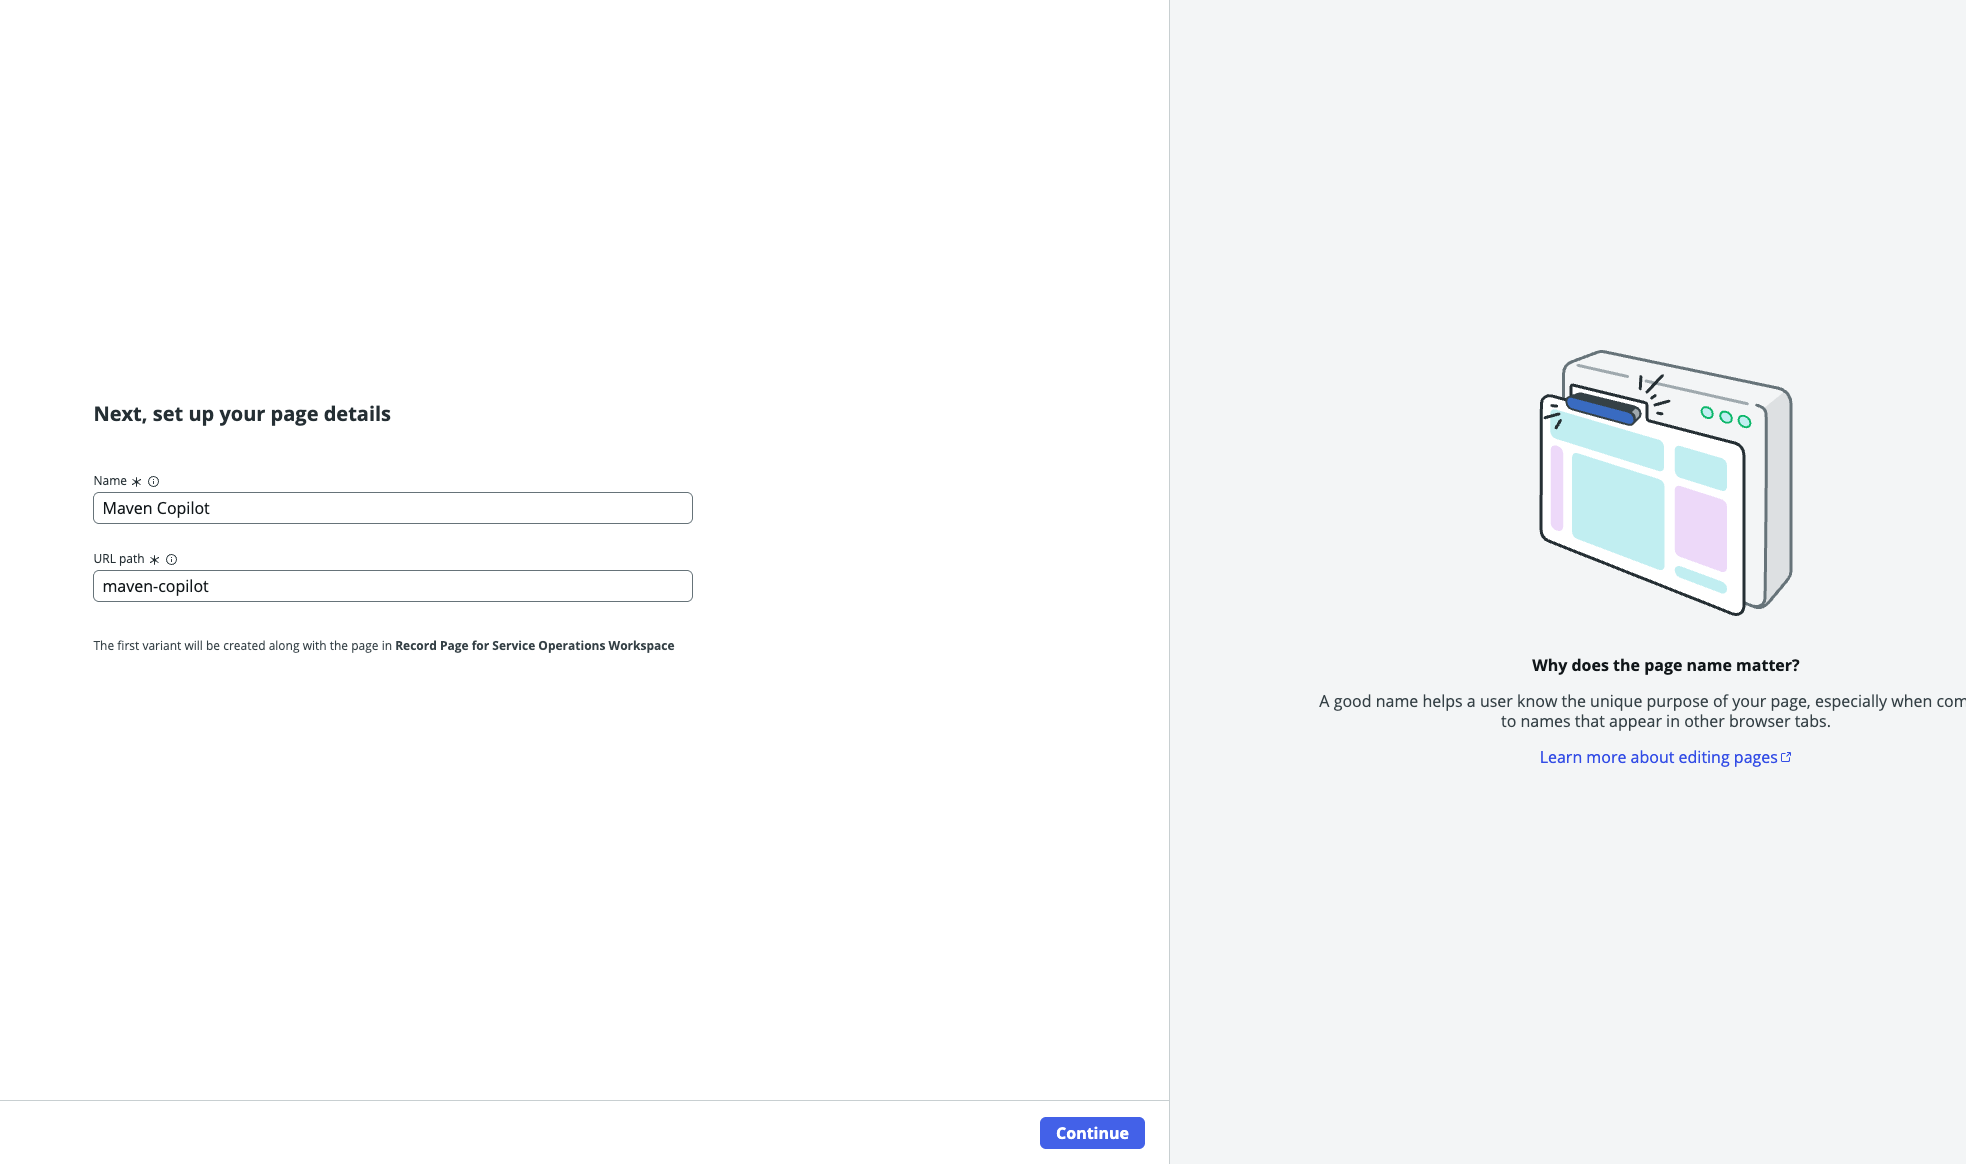
- Review the component parameters. No required parameters are necessary, and you can proceed to pressing Looks Good
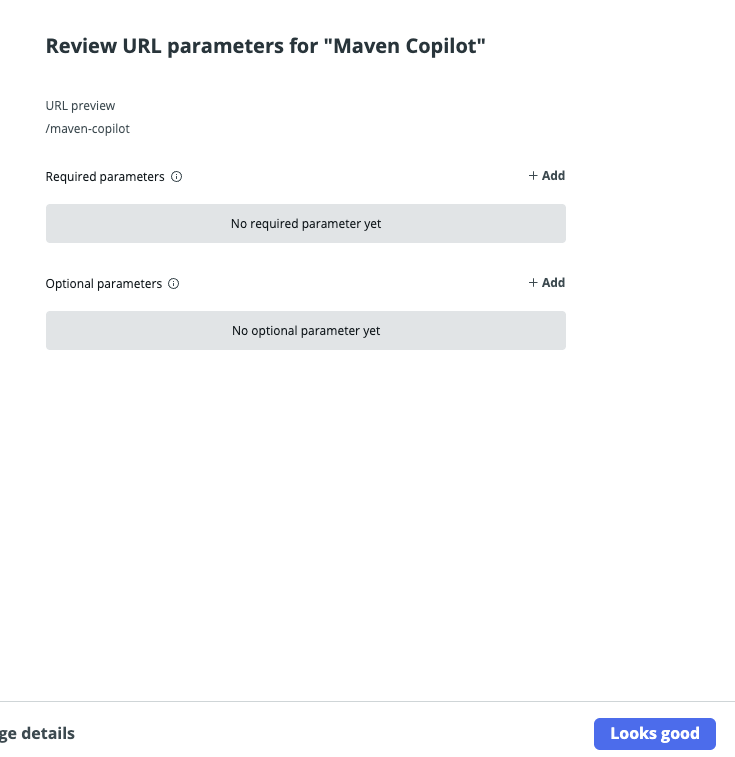
- You can leave the name set as default and simply click Continue
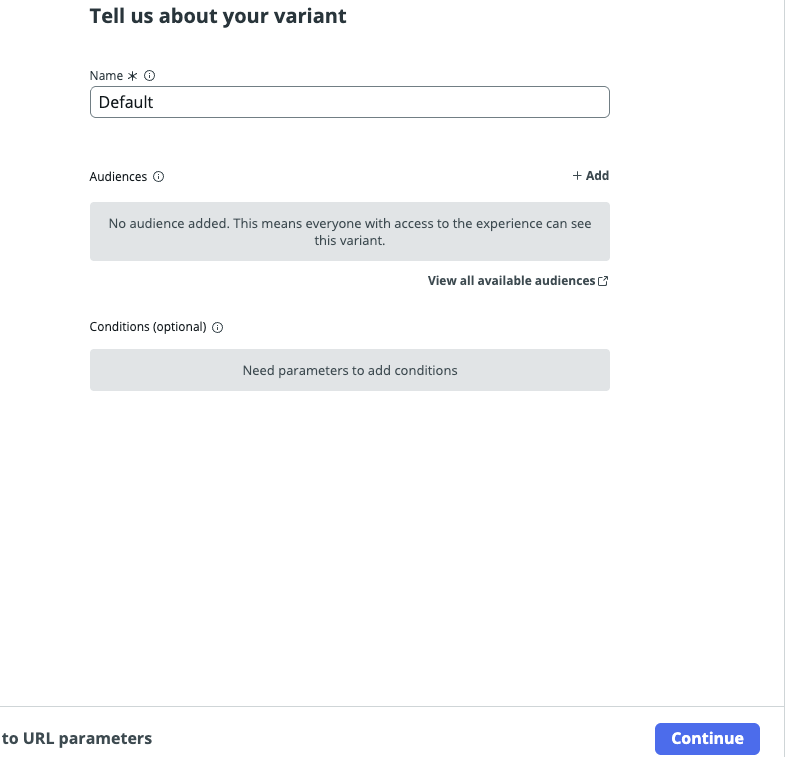
- You can choose the Build responsive option
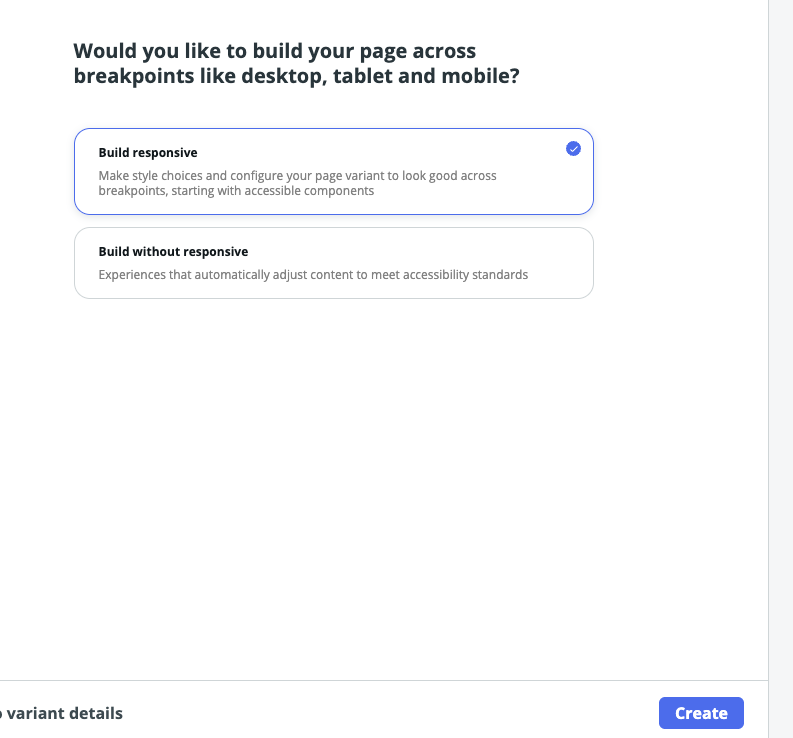
- Click Create
4.4 Add Maven Copilot Component
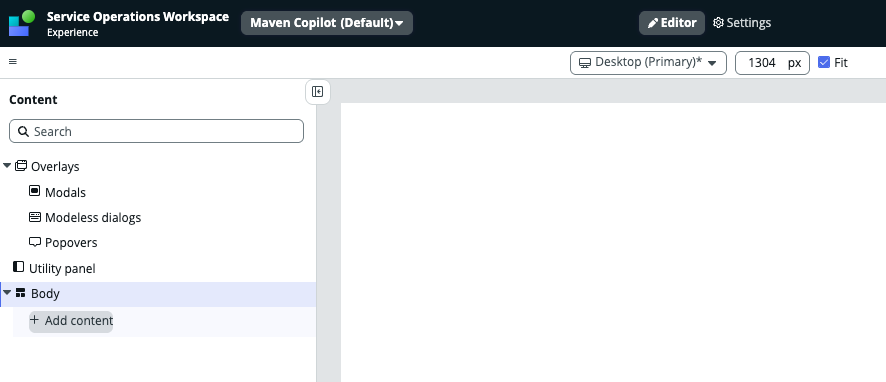
Now that you’ve created the page in ServiceNow, you can add the Maven Copilot UI component to this page.
- On the new page’s body, click Add content
- Search for Maven Copilot component
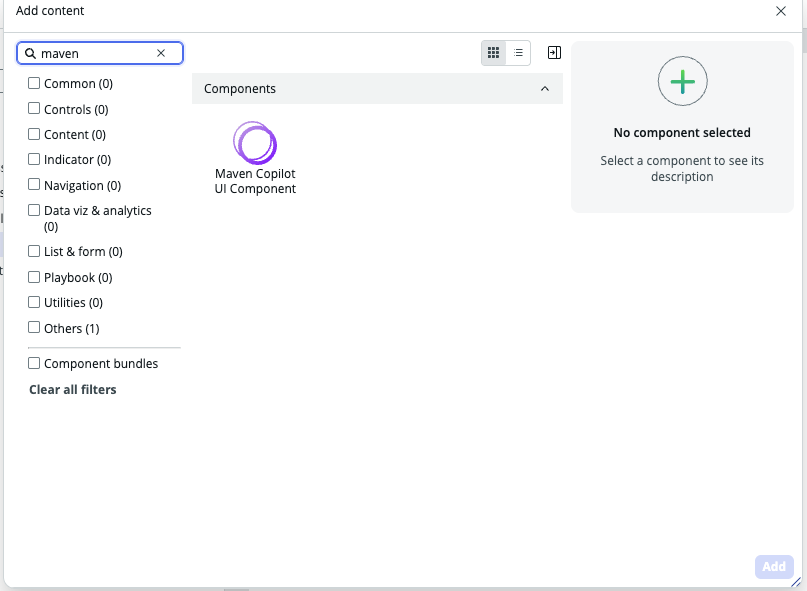
- Add the component to the page
- Click Save
4.5 Configure Sidebar Icon (Optional)
ServiceNow Bug: There is a bug in ServiceNow that prevents the icon from being shown by default. If you want the Maven icon to be displayed in the sidebar, you must follow these additional steps.
- Navigate to: All > sys_ux_app_route.list

- Search for: Maven Copilot
- Filter by: Extension Point: SOW - Sidebar tabs top
- Click on the record to edit (click “here” if you see the link “To edit this record click here”)
- In the Icon field, enter:
sn_tile_icon/x-magi-maven-copilot-ui-component.svg - Click Save
If you don’t see the icon field in the form:
- Right-click on the form and select Form Layout
- In the left panel, find icon field
- Click the arrow to move it to the right panel (make sure it appears above endsplit)
- Click Save
- The icon field should now appear in the form
- Fill in the icon path:
sn_tile_icon/x-magi-maven-copilot-ui-component.svg - Click Save
5. Test the Installation
5.1 Navigate to Service Operations Workspace
Before navigating to Service Operations Workspace, ensure you have selected the Maven AGI Copilot (x_magi_app) scope in the scope selector. Failure to select the correct scope may result in permission errors.
- Select the Maven AGI Copilot (x_magi_app) scope from the scope selector in the top navigation bar
- Navigate to: Service Operations Workspace

- Select the list icon on the left sidebar
- Choose Incidents: All
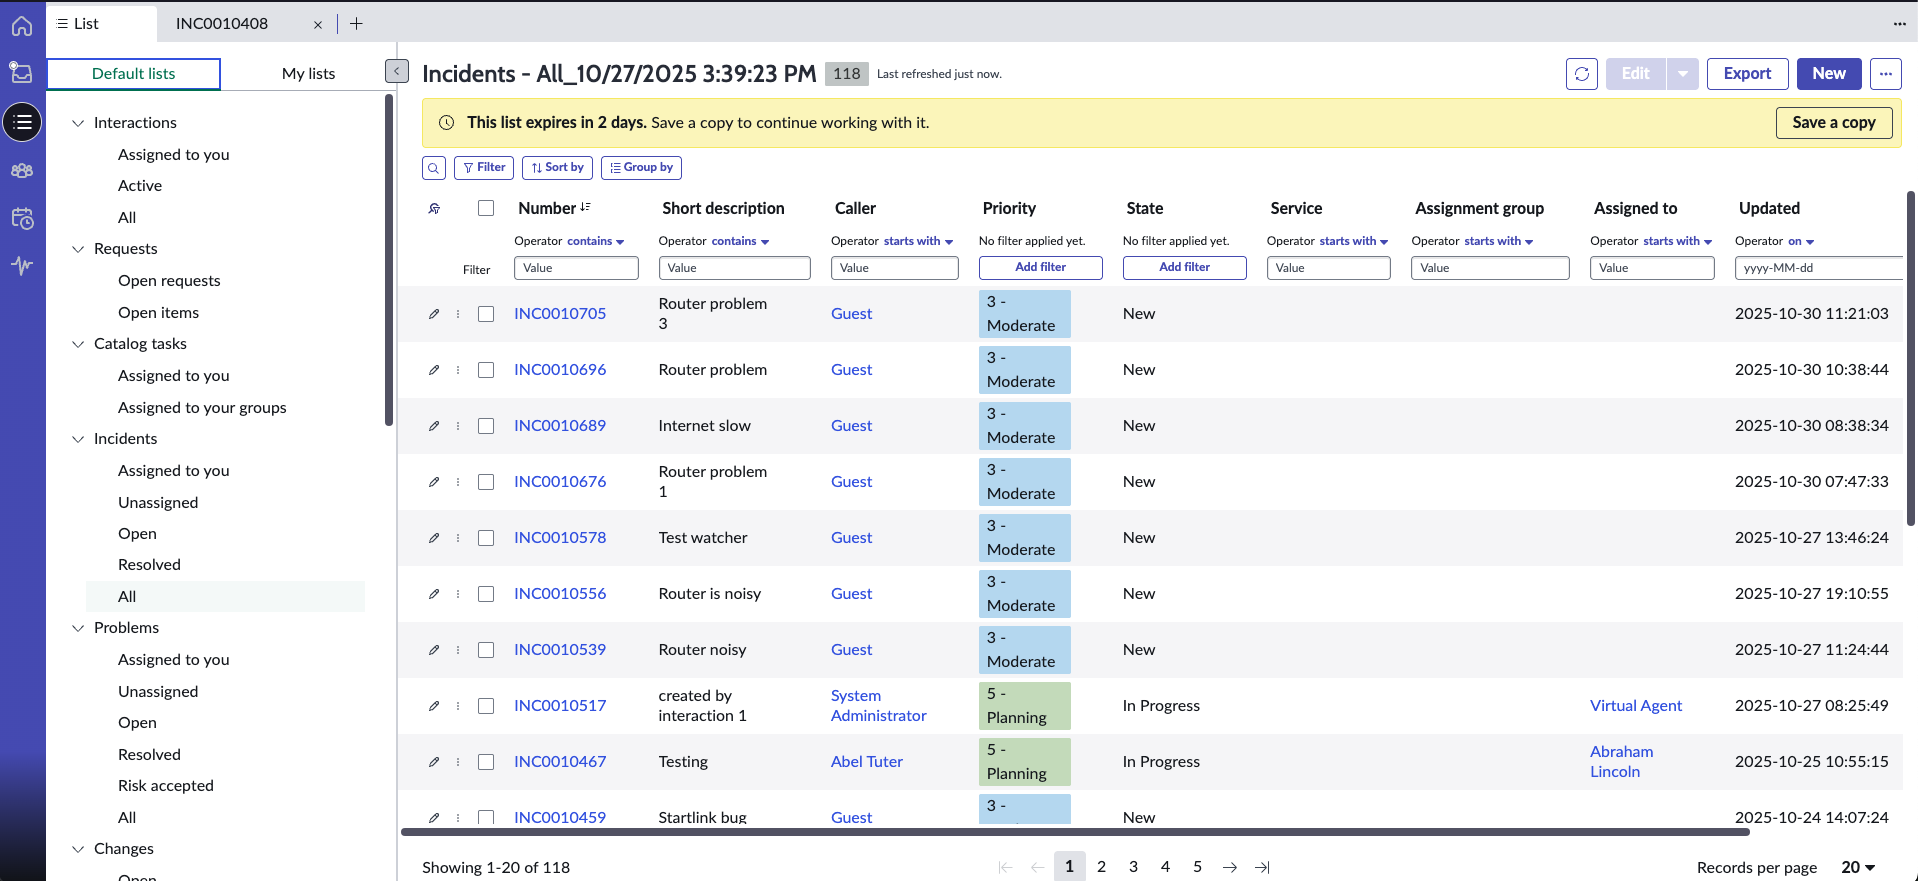
If your instance has demo data loaded, you should see a list of incidents.
5.2 Verify Copilot is Running
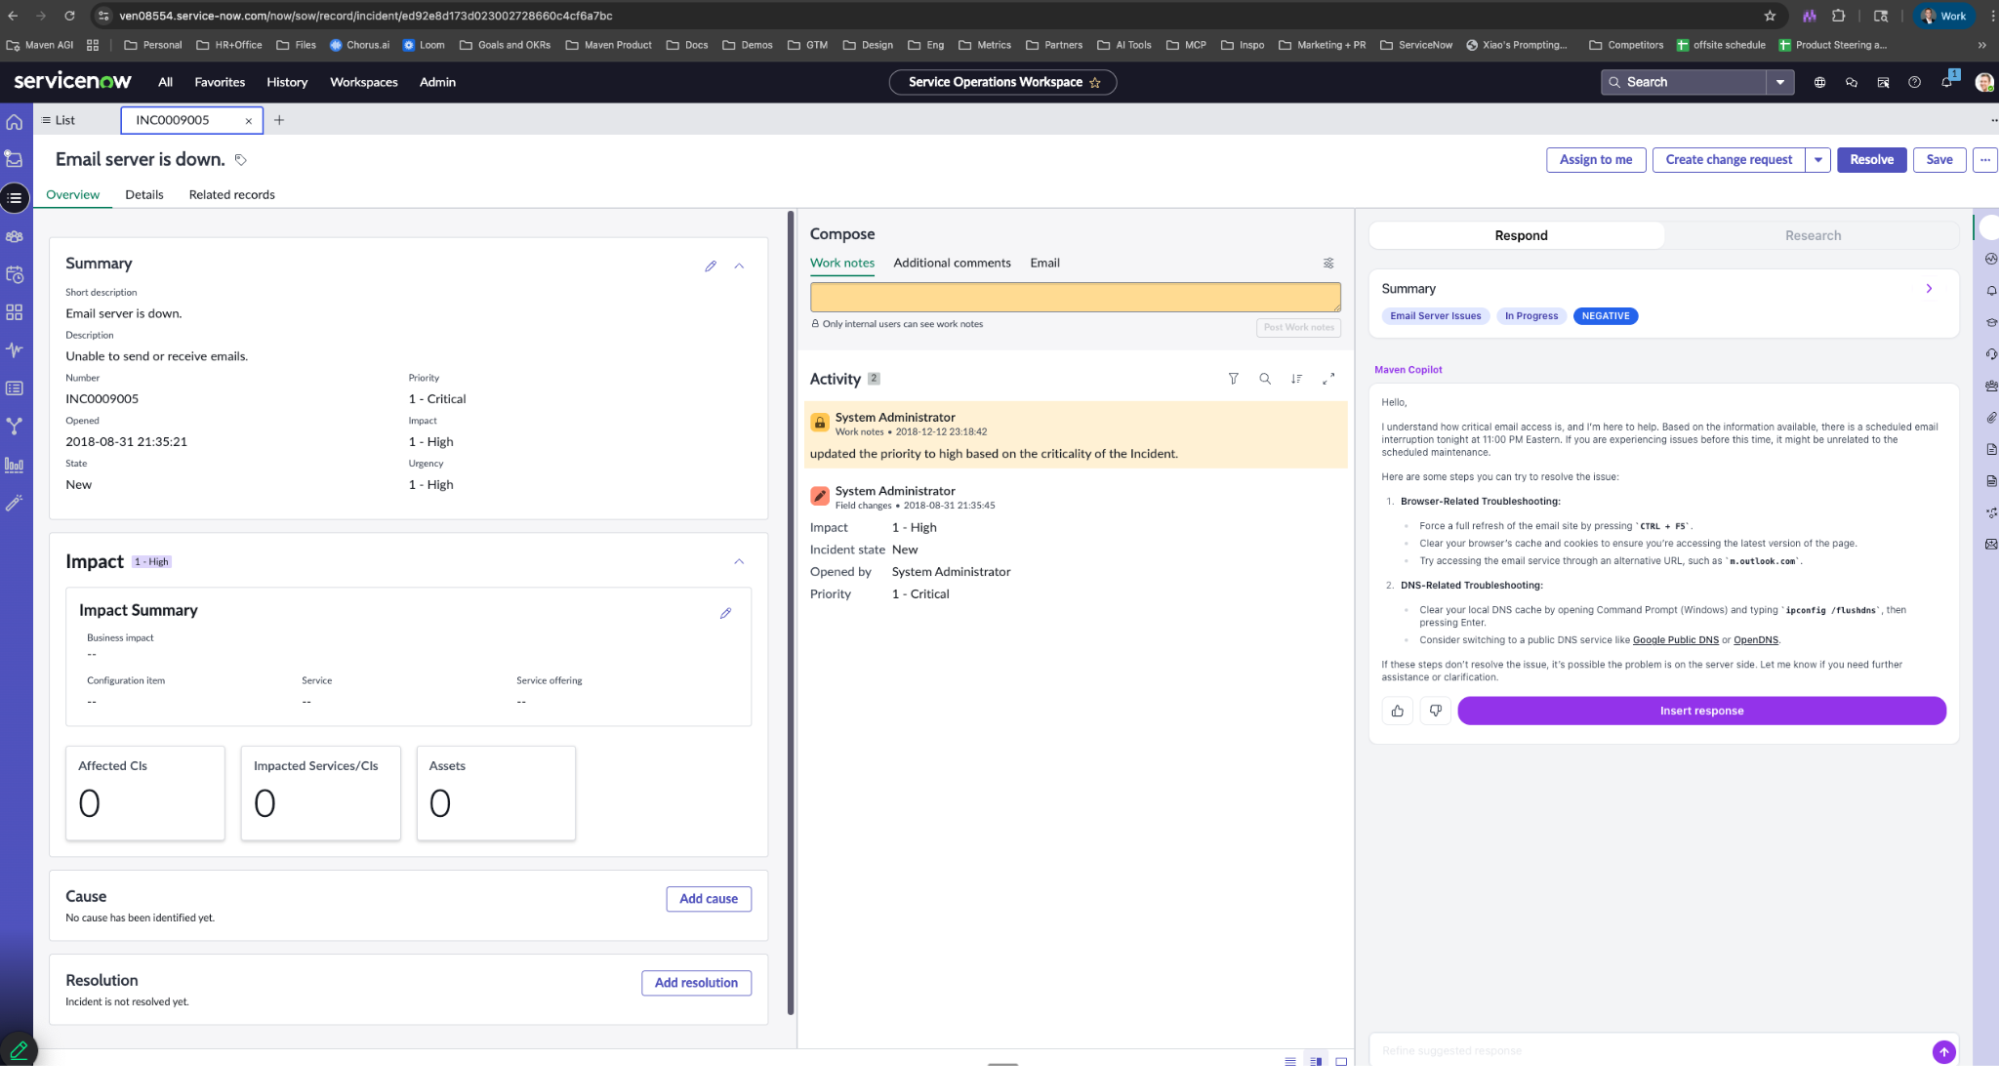
- Click on any incident to open it
- Look for the Maven Copilot icon in the right sidebar
- Click the Maven icon
- The Maven Copilot sidebar should load and display
6. Email Configuration (Optional)
6.1 Email Properties
- Navigate to: All > Email Properties

- Go to Email Properties
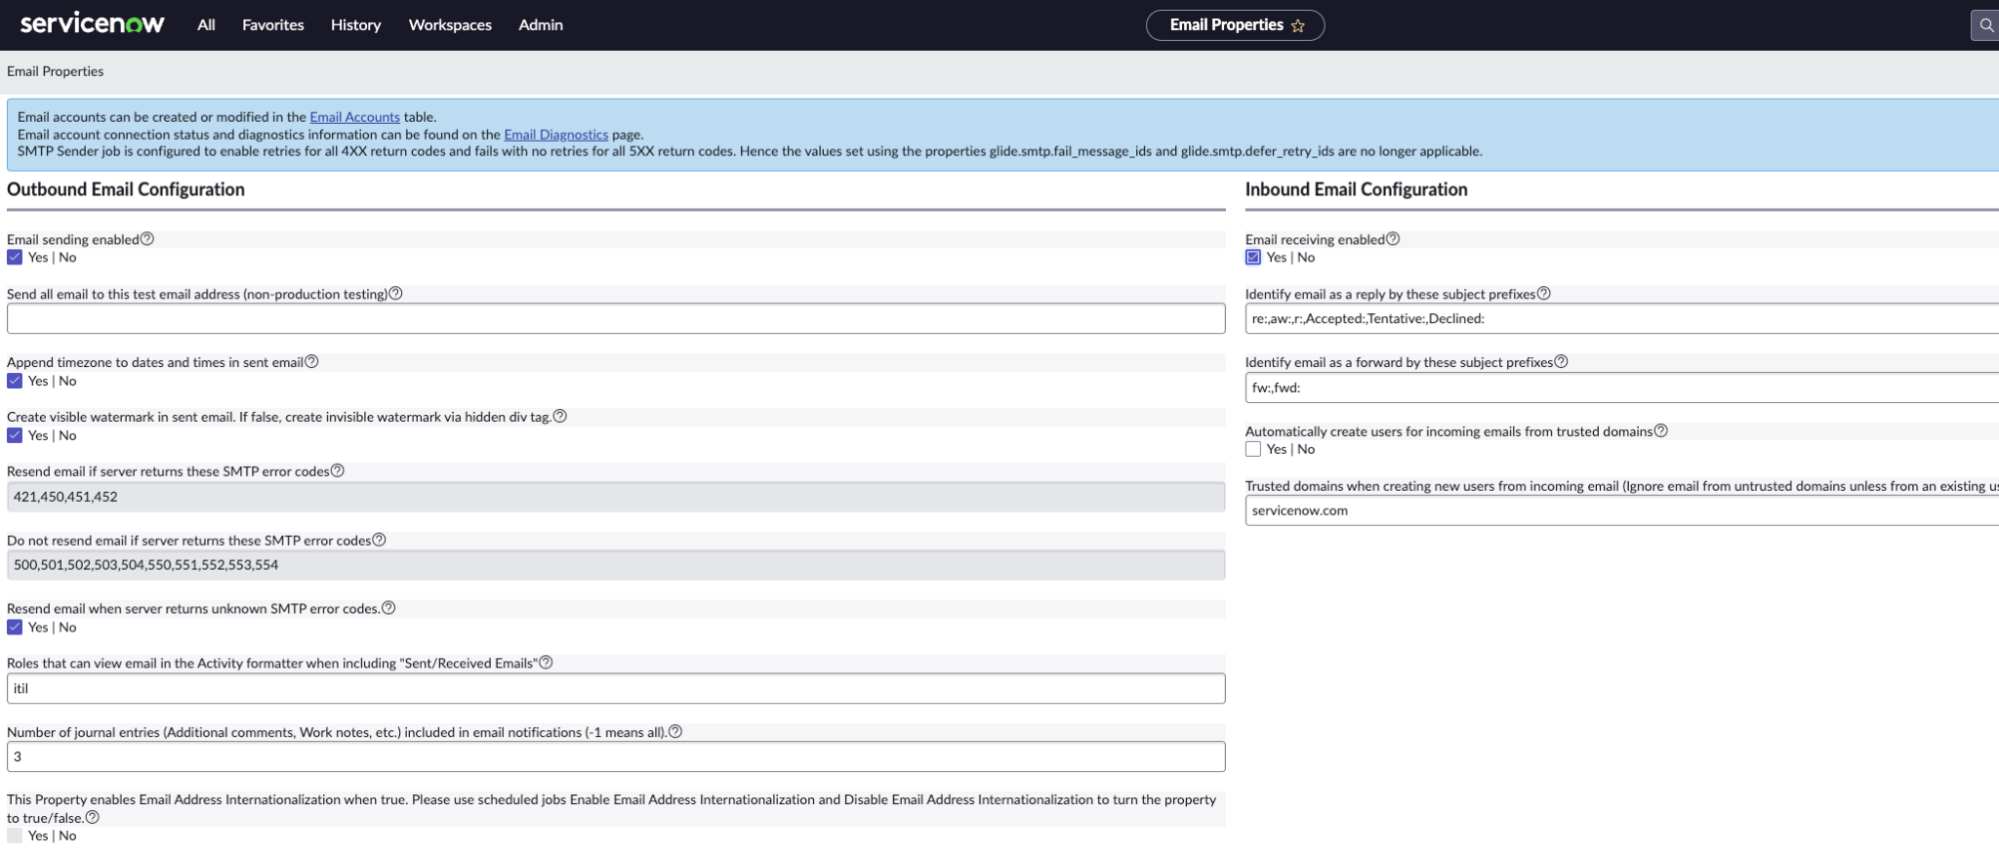
- Ensure the following are enabled:
- Email sending enabled
- Email receiving enabled
6.2 Email Accounts
- Navigate to Email Accounts
- Configure POP3/IMAP/SMTP accounts as needed
If you already have email accounts configured, this step is not necessary. Default email accounts for vendor instances use the pattern [instance]@service-now.com.
Inbound Actions for email-triggered incident creation are already configured by the Maven AGI Copilot application. No additional configuration is required.
6.3 Testing Email
- Ensure email sending and receiving are enabled in Email Properties
- Send a test email to the configured email account
- Check System Mailboxes > Received for the received email
- Open the incident created from the email
- Verify the Maven Copilot sidebar loads on the right side of the screen
Troubleshooting
OAuth Configuration Issues
Error: “integration user is not configured for OAuth”
This error occurs when the OAuth Application User field is not set in the OAuth application record.
Solution:
- Verify the system property
glide.oauth.inbound.client.credential.grant_type.enabledis created and set totrueBEFORE creating the OAuth Client Credentials Grant - Navigate to System OAuth > Application Registry and open your OAuth application record
- If the OAuth Application User field is not visible, add it to the form layout (right-click form → Form Layout → add the field)
- Set the OAuth Application User to System Administrator
- Save the record and try authenticating again
Icon Not Appearing in Sidebar
If the Maven Copilot icon is not appearing in the sidebar:
- Navigate to: All > sys_ux_app_route.list
- Find the Maven Copilot route record
- Ensure the icon field is included in the form layout
- Verify the icon path is correct:
sn_tile_icon/x-magi-maven-copilot-ui-component.svg
Component Not Loading
If the Maven Copilot component is not loading:
- Verify all application properties are set correctly via the Maven Configuration Page
- Check that the application is installed and active
- Verify you have the correct roles assigned
- Check browser console for any error messages
Copilot Shows “Connection Error”
Possible causes:
- Network connectivity issue between ServiceNow and Maven
- OAuth credentials incorrect or expired
- Maven agent not active
Solution: Verify OAuth configuration in both ServiceNow and Agent Designer
Summary
After completing this installation guide, you should have:
- ✅ OAuth Client Credentials Grant configured
- ✅ Maven AGI agent configured with ServiceNow credentials
- ✅ Application properties configured (via Maven Configuration Page)
- ✅ UI Builder configured for Service Operations Workspace
- ✅ Maven Copilot component visible and functional in SOW
- ✅ Email integration configured (optional)
Support
For additional assistance:
- Maven Support: support.mavenagi.com
- ServiceNow Documentation: docs.servicenow.com
- Maven AGI Copilot in ServiceNow Store: store.servicenow.com
Next Steps
After completing setup:
- Train your Maven agent: Add ServiceNow-specific knowledge to your Maven knowledge base
- Configure personas: Customize Maven’s tone and style for ServiceNow interactions
- Set up actions: Enable Maven to take actions in ServiceNow (create follow-up tasks, update fields, etc.)
- Monitor performance: Use Maven Insights to track copilot usage and effectiveness
For more on optimizing your Maven agent, see: